What goes on behind the smoke and mirrors of an architectural photographers camera during a cover shoot.
Creative photography can be accomplished in a single click. Extra special photography, images that evoke an air of dreaminess, perceived reality, or even a reaction, are more difficult to achieve in a single frame. This post will show you how I created a reality that just could not be accomplished without the help of patience, effort, and skill.
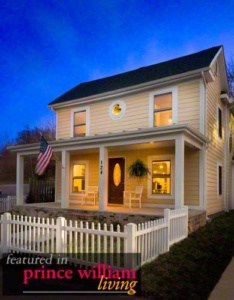
This photo taken by Woodbridge photographer, Mark Gilvey shows this beautiful home in early evening. The sky is an electric blue because it was photographed during the “blue” hour. The actual cover of the May issue of Prince William Living looks a little different because this shade of blue is not printable by today’s four-color presses.
I created this image for the May 2015 cover of Prince William Living magazine. My goals were to make it look beautiful (that was the easy part because it’s already beautiful), homey, and with a certain amount of mystery. It is not supposed to be a clear document of how it looked on this day (although it could have been and many who don’t read this will think that it was.) It is not the truth of what it looks like every evening but, what is, is inviting. It feels warm and friendly. It makes me feel like I could just walk in and sit down and have dinner. I don’t have to imagine it, I can feel it.
Now, if you are a realtor reading this, before you rush out and tell your photographer to start taking exterior photos in the evening, you’re going to want to know what went into taking this photo and how long it took. Not everyone can do what I’ve done here and not everyone wants to know how to.
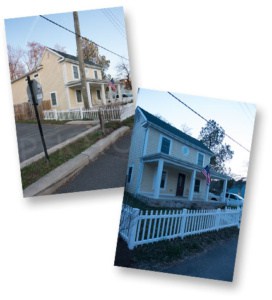 Location Scouting
The first step is to do a little research so the photograph can be taken at the right time of day. In the case of the magazine, three properties had been selected as candidates. I visited each to evaluate where the sun rises or sets in relation to the structure. I also surveyed the foliage that was around it for any trash or unnecessary items laying about the yard. Scouting is a necessary step with this type of image and can be an opportunity to make face-to-face contact with the owner, realtor, or property manager.
All of the locations were in Prince William County at either end. Let’s start the clock here; it took about one-and-a-half hours in the morning and in the evening to scout these particular  sites. While I was at each location I took some photos so I could send them to the magazine editor for final location selection. Since I did not know what the article was about, I had the editor make the selection because I didn’t want to pick a house that didn’t have the right look for the article they may have wanted. All three locations were recent sells.
The fact that this shot was bound for the cover, it had to be more than just a shot of a recent sell, more than a documentary, more than the truth. It had to be inviting and make me wish I was there…didn’t I just mention all this a few paragraphs up?
Professional Real Estate Photography On (express) Schedule
A quick look at the weather report for the coming week convinced me that the shot had to be done immediately—I couldn’t decide if it should be photographed in the morning or the evening. Clouds and rain were forecast for the rest of the week. So the owners were contacted and informed that their house was the big winner for the cover. They were advised about several quick fixes that needed to be done and when I would arrive.
As I pulled up, the owners were out front making some last minute improvements and clean ups. These folks had no idea what was going to happen other than “a picture” was going to be taken of their house for the cover of a magazine.
I spoke briefly with the owner about what I was going to do while he finished cleaning up and I set up my gear. Now you might think that a camera and a lens is enough to take a picture of a house and that is true. But to make an image that evokes a response, yes it can be done in a single shot but I prefer to stack the deck in my favor by taking multiple images and creating a photo-illustration, or composite. Doing this gives me the same control that a painter would have with brush an pigment.
I set up my camera and I attached my wide angle perspective correction lens to the body. This is a special purpose lens that is used by professional architectural photographers to adjust the plain of focus and the position of the subject in the frame without having to move the camera or having to correct for one more thing during post processing. It’s not a lens that everyone wants or even needs. I’m not going to bore you with the details but it suffices to say, it’s the right lens to use.
I added a extra battery pack to the camera because I’d have to have the camera turned on for long periods and didn’t want to have to remove the camera to replace the battery if and when it became exhausted. Lastly I attached an electronic cable release so I could minimize the amount of touching I needed to do on the camera body. In all, a lot of consideration went into what gear was needed and that it would last for the length of the shoot without me having to touch the camera and possibly losing registration from one frame to the next.
 Snap goes the shutter and It’s (not) done!
Over the next three hours, I photographed the house from a single point of view using a set of bracketed exposures. I never move the camera. I waited a while for the sun to go down and then photographed some more. In-between photographing brackets, there is some time to set up lighting gear.
What do you need lighting gear for?
If the interior of the house is not lit very well, I will sometimes place a studio strobe unit inside the problem room to provide supplemental lighting. The strobe is triggered through a wireless system that is set in motion at my camera. If more rooms need help then each will get a strobe. I had four studio strobes with me but I lucked out and didn’t need to use any on the interior.
So I decided to use one studio strobe to add accent lighting on certain parts of the scene. I would normally just push the shutter release and the strobe would fire but tonight, my electronics decided to be “stupid” and forget how to sync. So I had to think on the fly and adjust my shutter speed to a point where it was just short enough not to capture too much ambient light and only capture the flash from the strobe. Who said photographing architecture couldn’t be exciting! I ended up holding the camera remote in one hand and the wireless trigger in the other and then, in sequence, clicked the camera shutter and then popped the strobe immediately before the shutter closed. My image was confirmed on the back of the LCD monitor, I got want I needed.
I continued to move the strobe around the front and side of the yard and pointed it at various things to highlight them a while the owner ran a power cord around the back of the house and relocate moving boxes while he tried to find an electrical outlet. I ended up with about 117 frames of the front of the house from the same spot. Just so it’s clear, that means there are no other views of this house. I did all of this for one single view.

This Photoshop Layers palette shows how many layers went into creating this photo. Many of the layers come from different images selected from the stock of 117 images.
Great horny toads! What are you going to do with 117 photos of the same thing?
Create. After the photography is completed, what happens next? Is the job finished? No. Not nearly. But to some people, they might think the photography is the music at this point. Walk with me now… I’ve got something really cool whisper in your ear!
Now is when the real magic happens!
Now that I have 117 images on my computer, what’s next. First, I’m going to update the metadata and include copyright information as it pertains to the magazine. The photos get imported into my post processing software and then I (put on my wizards hat and) begin to make some decisions on what exposure I’ll use as my base and what I will add to it. It’s very similar to deciding what you want to paint on a canvas if you were a painter. I have no idea what the final image will look like until I get all the elements put together. There is no way to pre visualize this and there is nothing cookie cutter about it—it is custom photo-illustration.
So I grab pieces from several of the photos and add them to the base file. (insert graphic showing several images with areas circled that indicate the parts you composited) Making corrections, making color changes, masking parts out, looking at problems (oops part of this sequence was out of focus…can I still use the blurry part as an accent?) These are all questions that go through my head as I strive to maintain technical quality in the image at the same time.
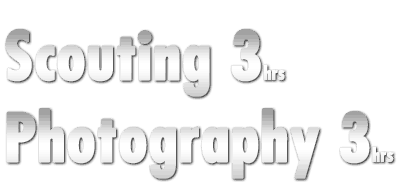
I’m at 6 hours of time before beginning to create the image. Could any of it have been trimmed? Maybe, if I only had one location to go to, it might have cut down one, maybe two hours but the photography, no way, can’t get around it. It had to be done during a certain time of the day and for a certain period of time and with good weather. If any of those didn’t match up (oh, plus an owners who took care to have everything ready on time, kudos to them), the shoot would not have succeeded.
The retouching and compositing time it takes to work with all these parts, is initially about three hours. But then you have to close the file down and look at it again a day later to see if it still looks right, and it never does. Some more time is spent tweaking things and then BAM! In a heart beat! It’s done! No, it’s not. It still has to go through a review process and the editor or art director may send it back for another round of changes.
 11 hours to work an image to this level of perfection. Is it perfect, no, not in the least. Only I know what the problems are which I’ll keep to myself thank you. You can work an image to 98% but the last 2% you’ll spend the rest of your life working on—this one is at 98% as it applies to this specific usage. The important thing is with the extra time that went into the image, we now have a photo that will make the reader wish they could walk into the house or even sit on the porch while the sun sets and the warm glow of the interior lights and porch lights come on. Now it feels homey and warm and so do I.
Not everyone needs a photograph with this level of work or expense but I’m sure there are some realtors and property managers that would know how to market their property with this type of imagery in their arsenal.
How can I help bring this same style of real estate photography to your really important sells?
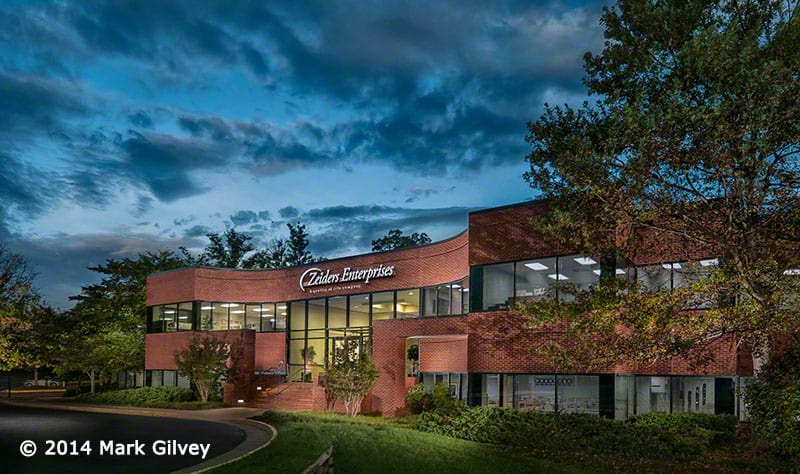
I’ll leave you with one more image for thought. Here is a building using the same techniques but it was photographed at 4AM, it required about the same amount of time to complete.


Mark,
Interesting to read about how a real pro puts it all together. Thanks for the insight into the planning and execution involved in taking the pic.
R, Dan
Mark,
My question is, why didn’t you become a writer?! Great blog, great photography.
-Laurie
Coming from a copywriter, I’ll take that as a real compliment! I’d rather spend the time creating imagery than writing to be truthful. I wrote this because I feel that people sometimes don’t realize how much goes into the creation of a photo like this.